From flat to 3D - A creation of my final piece (June Update)
- jacobmo3042
- Apr 13, 2020
- 12 min read
Updated: Jun 10, 2020
Here is where I will be documenting the creation of my final piece. I will be showing the creation of my concept art as well as 3D models that will all come together to make the Final piece of art work for this project.
To Do list
- Create creature concept art - Completed
- Create Character Art - Started
- Create a Piece of world concept art (underground hive or above ground)
- Create a 3D model from concept art - Started
Digital 3D modelling
To Begin my 3d modelling I first needed my reference pictures, I used my own concept art as well as a google search for WW2 Helmet.
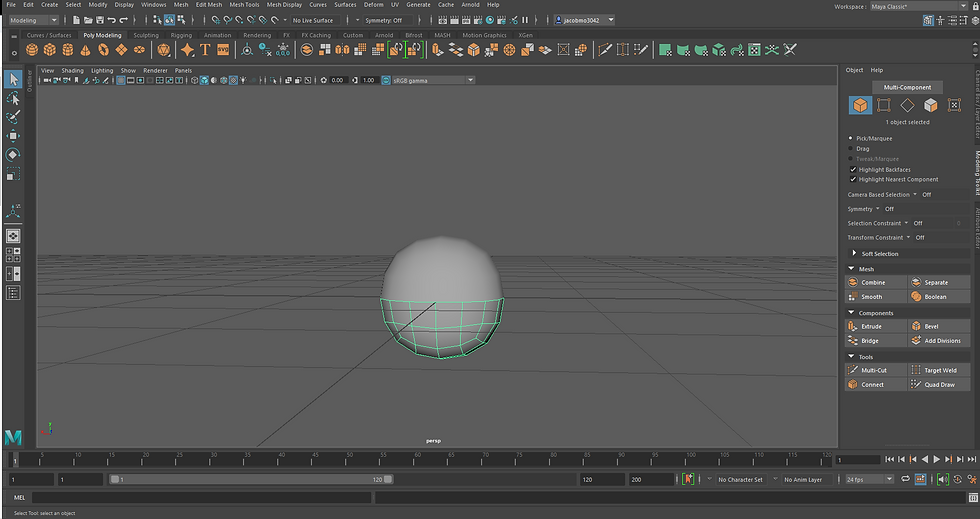
I then opened the 3D program I am using (Maya), Set up my project file and created cube to work from.

*Note that there are a variety of views to use when modelling, this is the standard view, the rounded view shows what the model will look like once the program smooths it. this square would have smooth edges if I rendered it*
With my square mesh I now have 6 faces, 8 vertexes, 12 edges to work from. This is not enough to create much with so I need to add more vertexes and edges creating a higher poly model. In theory the more vertexes, the more detail the model will be but this also makes the model harder to render and process for the computer.
I want to create a sphere as this shape is closest to the shape of a helmet. to do this I use the smooth tool on the square. The reason I turned a square mesh into a sphere instead of using the sphere mesh to begin with is because the sphere mesh has all its edges meet at the top, as seen by the orange icon on the top right, the sphere I created allows for equal vertex arrangement on every angle.

I now need to cut my sphere in half so it matches the shape of a helmet more, to do this I select half the mesh and use the detach feature and then delete the bottom half
Once I cut the sphere in half I had a hollow shell, so I need to fill it. I selected the bottom edges and extruded them inside, then selected the vertexes and joined them into the middle, filling the bottom of the shape for me

when viewed in the smoothed mode, the mesh was rounded at the bottom looking like a blob, to prevent this and achieve the rigid look I'm aiming for I inserted an edge loop as close to the bottom edge as possible, this acts as a buffer to prevent the program from smoothing the last edge.

now I have the base shape done, I need to get the silhouette. This process was done by scaling, moving and rotating vertexes, faces and edges, until I was happy with the shape I created 3 different shapes but chose to work from one( the middle one). I made sure to bevel the bottom inwards so that its shaped like a helmet instead of being a solid object.


the general shape of the helmet is done, I plan to do small adjustments along the way but my focus now is adding details and accessories to the model, the first accessory I chose to model was the leather strap found on most WW2 era helmets. From what I could research, this strap was used for attaching netting and camouflage to the helmet.
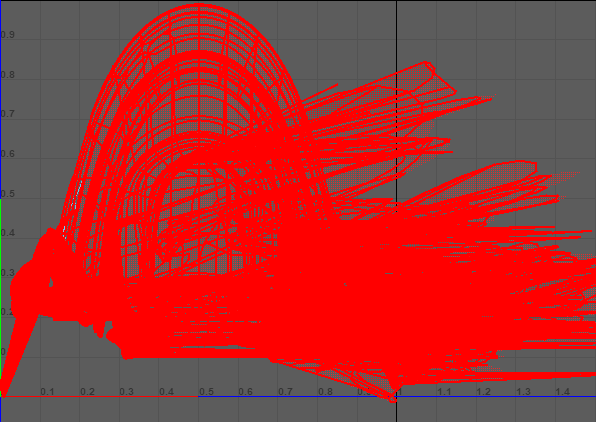
I chose to do this first because it would be the most difficult part to model, but its also the largest and most recognisable feature. The first technique I tried was extruding a rectangle over a custom curve path, this ended up taking hours due to the endless issues it gave me, such as the shape extruding and connecting into a loops as seen in the below image.
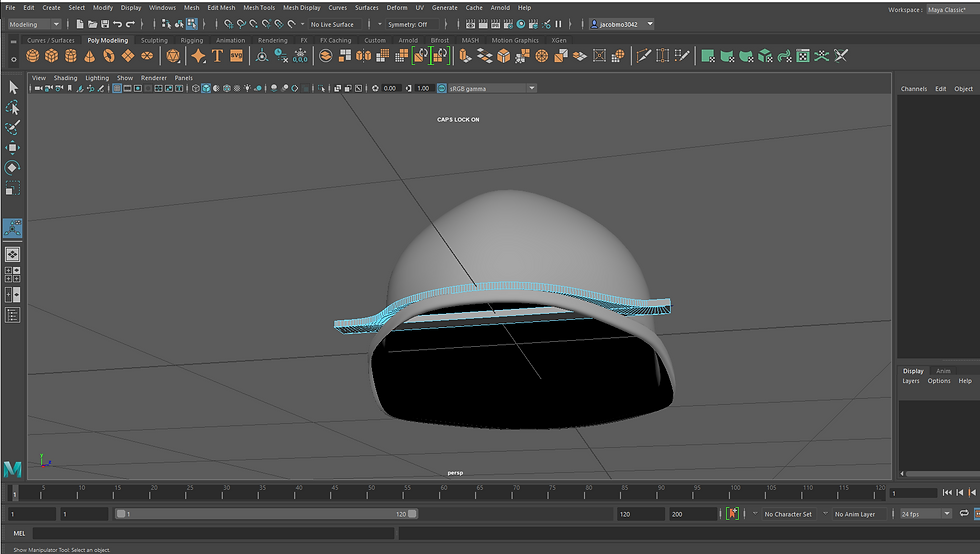
After resolving the issues the end result was very difficult to work with as it wouldn't shape to the helmet model well so I tried a different technique. The technique I stuck with was extruding out from the helmet mesh, then extruding and rotating from the side, repeating until it stretched over the front. The difference in using this over the curve path is that the strap I not a separate mesh, which might mean its harder to texture.
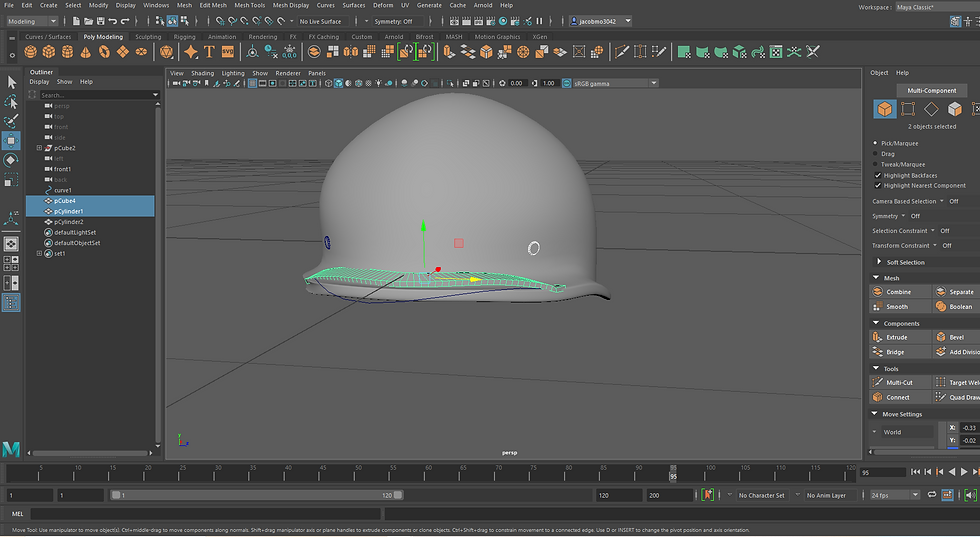
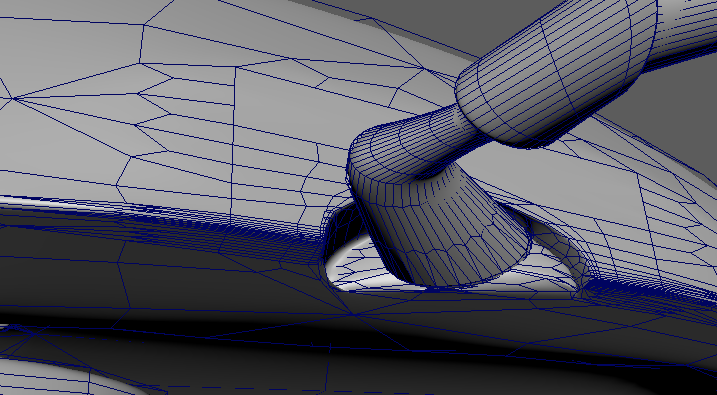
Once I finished the strap I then wanted to add the "Bolts" that pin the inside of the helmet together. This was simple I just used to cylinders that I scaled and flattened, then sat them on the outside of the helmet mesh. I am unsure of if not attaching them to the mesh will cause issues but there is no way of knowing until I render or texture them.
I decided not to use the bolt and to also change the strap to one that wraps round more. Issues and solutions Custom curve paths - When creating the leather strap around the helmet I ran into plenty of issues when trying to learn how to extrude a mesh over a custom curve path. Issues included, the shape not extruding at all, the shape extruding inside out and the shape extruding all the way around past the path connecting into a loop. - the solution ended up being that I was extruding from the end of the path and not the beginning, as well as selecting the mesh in world mode not object mode. - Although I ended up not using this techniques, but I am happy that I gave it a go as it taught me a useful technique to use in the Maya program. UV Maps - During the middle of this process I discovered that the techniques used impact the effectiveness of UV maps which decide where textures are placed on the model. My knowledge of modelling and texturing is in no way advanced enough combat this issue, and my model does not rely heavily on textures, so I decided to worry about this when the time comes, if it does.
Mirroring - a useful time saver is having one side of your model mirror the other so that you don't have to model both sides, this also helps with symmetry. When doing this the mirror would be facing the wrong way or inverted, the reason for this was I started the model from the angle (the front of my model was facing the left side of the modelling environment), I tried to invert it with some success but this called issues with joining the seem. modelling with a mirror means changes made on the outer edge where the mirror starts creates a gap, there is a solution to this but I had no success (likely because I had to invert my mirror) - I decided it wasn't something I needed enough to invest more time into fixing as I wasn't sure if my model was going to be symmetrical anyway. WIX deleting/ not saving work - For some reason Wix refuses to save changes I've made on this website, but says that the work is saved, leading to me losing hours of documentation that I have to redo. I had to write out this documentation twice, I now make sure to copy and paste before saving, but this causes arrangement issues.
Bibliography
https://blog.atthefront.com/us_images/head/ww2-parts-m1c-front.jpg
Tutorial Videos
Curve paths - https://youtu.be/vx-n17nhYPE?t=1726
https://www.youtube.com/watch?v=nBpj7wZIrrk (Didn't help)
Strap solution - https://www.youtube.com/watch?v=JuSd6gv1tKk&t=1811s
General knowledge (Wasn't really useful) - https://www.youtube.com/watch?v=IdYNs03RF7o&t=452s
Previous tutorials (Tutorials watched in the past for preparation for this task)
Modelling the beetle
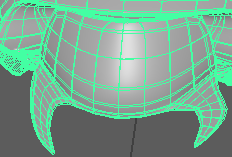
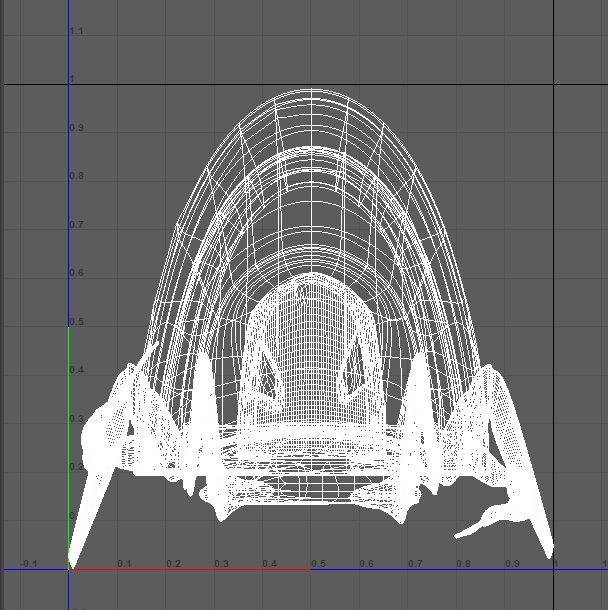
To model the beetle I used most of the same techniques as the helmet, along with some new ones such as Booleans (something I would regret). I started with a square that I smoothed into a sphere, I then cut the sphere in half and filled the bottom. now I have half a sphere I need to scale it to stretch it into a long half egg, this is done with the simple scale tool.


I now have the "shell" of the beetle (a round half egg shape) I now need to add depth and shape. to do this I would insert edge loops (loops an edge around the shape) into the shape where I would like separations in the shell. I would then highlight the faces between the edge loops and extrude them inwards using the face extrude tool.
This would give me bridges between the shell separation, to make it look separated from the shell I would add overhang and ledges of the shell, by selecting the shell part of the model and moving them closer without selecting the bridge part. I would also select and scale the separated parts of the shell so that they are different size (head and back).
The next thing to do is create the limbs, to do the legs I got a cylinder mesh and extruded the end face, extruding scaling and angling to get the shape I was looking for. I then used the Boolean option to connect it to the mesh.
For the back legs I needed to add a section for the legs to be placed, I used the Boolean option again for this (the two Booleans I used were; difference - where the intersecting areas of the two meshes is removed from the main mesh, leaving the shape of the removed shape onto the mesh. Union boolean - where the two meshes are joined together ) the Boolean for this was the difference Boolean to cut out a section for the legs to be placed.
I done the pincers first by extruding a face then angling and scaling the extrusion until it resembled the shape I was looking for.
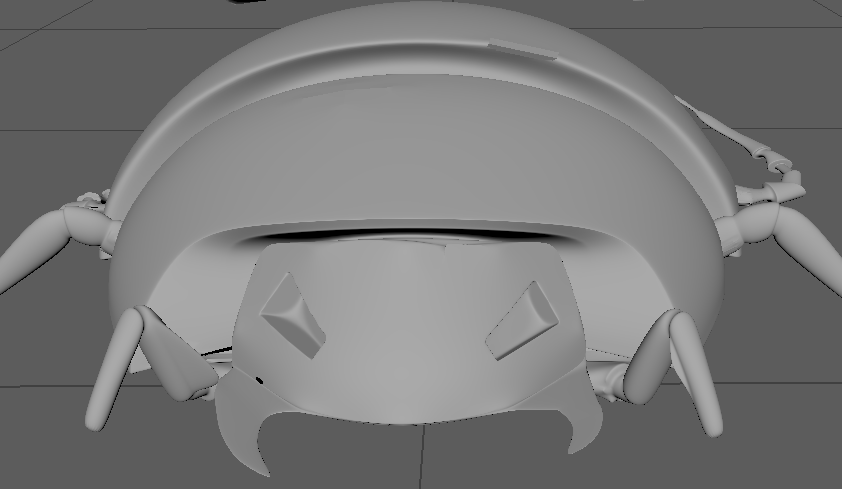
I attempted to create eyes using Booleans, but due to Booleans being unstable when I opened the file sometimes they would be there and sometimes they would be a mess in the mesh
Prepping the models for texturing
In order for the computer to know where textures go on the model, I need to create the UV map for the model. To do this I need to cut up the model to that it is unfolded and flat
(like when you unfold a square). This process takes time and involves selecting mesh edges, cutting them, separating them, and unfolding them.
Since this model is not being used in video or games I just need to make sure the UV map is correct from the camera view because we wont be viewing places like the bottom of the models.
Before
After

Before

After

before doing anything, the UV map is a mess, so to clean it up I use the "planar" tool, which lines up the map with the model. I then get to work cutting and unfolding the map.
Painting the mesh
To paint the mesh I used a program called "Substance Painter", the program is similar to photoshop and, allows me to create textures and place them onto the model, the program comes with texture that can be placed and altered, as well as feature such as generators "generate rust or edge wear or other effects" on the model. In summary, the textures consist of colours, affects, such as dirt and grunge, depths, generators, mask, shine and some others features that together look like realistic textures.
Before I start my texturing I need to "Bake my textures" which in basic terms, creates all the different layers such as "colour, metallic, depth...." for my model so that it can be painted, this process includes selecting a few settings such as the shader and texture definition (I chose 4k) then letting the program bake them, it took me around an hour for each model, during this time my computer is under heavy load, meaning it cant be used for anything else.
Helmet

once I had baked my texture I had to paint them, for the helmet I stared with the "Painted Tank metal" texture, I then changed the base color of the texture and altered the "Edge wear generator" to make the helmet look more worn. I had a basic for the helmets damage I then went over painting more damage of the helmet in places that seemed logical (the front of the helmet would have more damage than the side, and the brim would have more wear on the bottom from dragging across the ground or being placed down.)

the next thing I did was change the "Dust" layer to white so that it looked like exposed metal on the top. then paint in some more defined scratches, like engravings on the side of the helmet. and altered the rust settings, adding a paint later and painting more rust.
I then textured the leather strap using the "Weathered leather" texture, I altered the color and removed some dirt and scaled the grain size to fit the model.

To make sure the correct parts of the model are colored I used a black mask and used the polygon fill. the black mask works by covering the layer in black and then only applying the layer to the areas colored white.
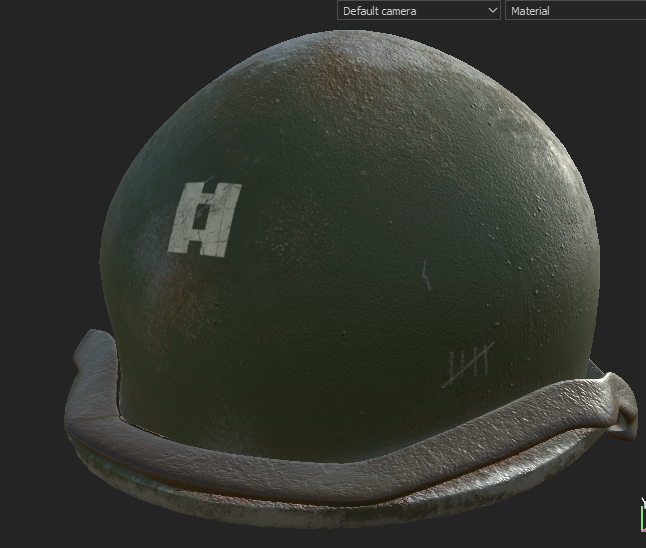
I then added a decal to the front of the helmet I chose the lieutenant bars. to do this I used Photoshop to make a black and white decal (black wont show and white will) then imported it into substance painter and stamped it onto the front of the helmet, I then used a white mask (the reverse of a black mask) and added a grunge effect over it to make it look painted on.
for finishing touches I went in with the brush and painted missing textures.
Beetle

For the beetle I experimented with textures for the shell, I tried using candle texture to get a wax look but after attempting to alter the texture to make my own I wasn't able to get the shiny film affect seen on chitin. I then went with the fiberglass texture, changes the coloring, removed some of the layers to make it less like fiberglass and reduced roughness and increase some smudges on the top to imitate the wax. I then went over the texture with a paint layer and painted some brown on the top of the shell. I then experimented with a wood layer to place over the limbs of the beetle to add more color.

for the non shell parts of the beetle I used the "monster tongue" texture, once again changing colours, removing some layers such as "pimples" to get a soft fleshy look (I know beetles don't really have a soft exterior on their exoskeleton but I wanted it to look like a weak spot on the creature, a vulnerability.

the final touch was adding eyes, for this I used a hollow circle pattern on a separate layer, I then added a glass texture and changed the colors to black and red, I increased the height value so the eyes popped out a bit.
Final touches/ rendering

Now I have my model design to a place i'm happy with, its now time to render it for display. to do this i load the assets into substance painter, apply the textures and then open the rendered and let it do its thing. I tried rendering in Arnold, the MAYA render engine but the final results were bad quality and also put a lot of strain on my computer, so i opted for Substance painter even though it was much harder to to get working.
Issues and solutions
Booleans - when I decided to use Booleans I was unsure why they weren't used more often. then after I had created the UV map for the beetle, I loaded it up to make a few adjustments and the whole UV map had been destroyed and distorted, the eyes where I had used Booleans were messy holes and the mesh had load of imperfections. - after hours of re-doing work for it to corrupt again, I realised that sometimes the save would open without issues. so to fix it, I removed the eyes, opened the file until it loaded with no issues and exported the model and imported it into a new save, then I re did the UV map. I found this solution through trouble shooting, I was concerned there was no fix, and my whole project would have been destroyed because everything I tried failed and I didn't have the slightest clue as to what was going on, highlighting the importance of backing up my work. (which I did not do often enough)
Example of one of many file errors, below
Unsmooth models - After exporting models out of Maya, they would appear in substance painter rigid and unsmooth. - after playing with export settings with no success, The solution was smoothing the model mesh to match the "smooth preview", this increased the poly count and fixed the issue.
Preview renders - When previewing my models through renders I noticed that the Maya rendered "Arnold" looked a lot worse that the substance painter, it had lots of noise, grain, and less detail. I looked at other rendering engines to use but without paying for them I could only use trial versions which would be locked at a lower quality. I tried to import the models and textures into the substance painter but because I exported the models as two separate items (a helmet and a beetle) I was unable to render the two models together. - after hours of trying to import the two meshes together, the solution ended up being, importing them into Maya, assigning them two different materials then exporting them back out as one, I then imported them into substance painter.
Assigning materials - after importing the models into substance painter as one, I couldn't figure out how to apply the textures I had already created back onto the models, as to not need to re paint the models all over again. - this took hours to fix as I couldn't find any guide online that helped. the solution was to export the textures then import them back into the new project file, I then had to manually apply each file into the correct place. this ended up working well, apart from I wasn't able to adjust the paint since they had already been exported
Adjusting exported textures after exporting the textures - I wasn't able to make edits as easily in substance painter - the solution is to adjust them in their original files then re apply them into the new file every change, this isn't efficient but as long as I make sure I re apply the textures after making all my changes, it isn't too much of a barrier.
Bibliography
https://www.youtube.com/watch?v=c_l1CZtmxp0 - texture baking
https://www.youtube.com/watch?v=r460HSyK_44 - exporting
https://www.youtube.com/watch?v=ZekbJ4Rghyk - UV wrapping
https://forum.substance3d.com/index.php?topic=9484.0 - rendering solution
https://www.youtube.com/watch?v=g9f0rPC1ENA - Arnold rendering
https://i.ytimg.com/vi/8uB2etpBp2E/maxresdefault.jpg - beetle reference
https://ptes.org/wp-content/uploads/2019/06/A-Silver-male-stag-beetle-header-PTES-great-stag-hunt-2019-e1561475715269.jpg - beetle reference
https://ichef.bbci.co.uk/news/1024/branded_news/17C6A/production/_100268379_iphthiminusitalicus-assessedasendangered.hervbouyon_preview.jpg - beetle reference
https://upload.wikimedia.org/wikipedia/commons/3/38/Xylotrupes_socrates_%28Siamese_rhinoceros_beetle%29.jpg - beetle reference


Comments